Fault Window |
  
|
Fault Window |
|
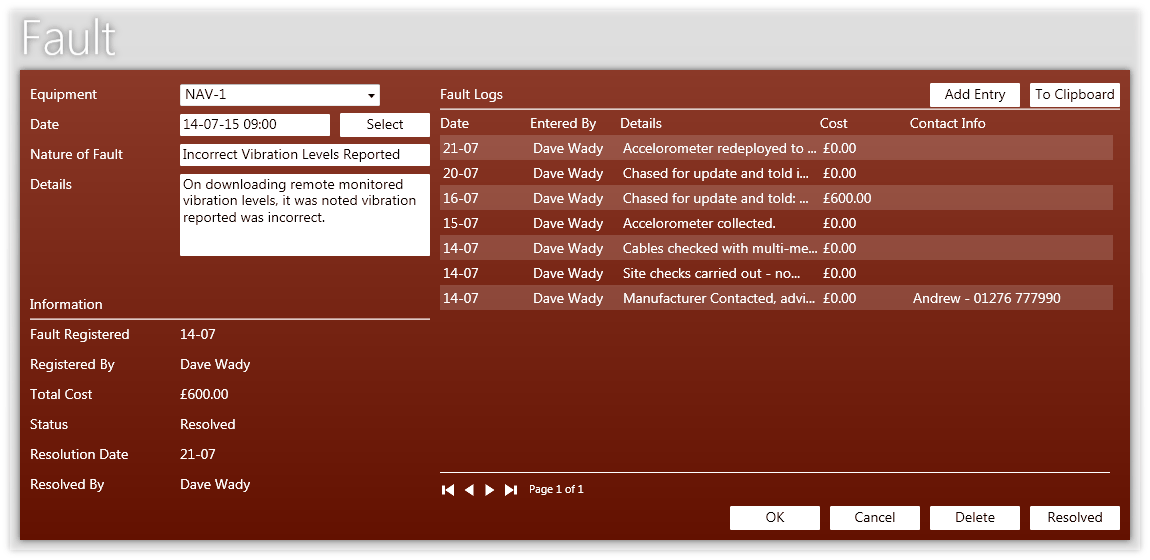
This is the item of equipment you are registering the fault for.
This is the date you would like for the Fault Registered field. By default, the date will be the current date. You can change this however, if you are registering a fault retrospectively, for example.
This is a brief description of the fault, such as "Incorrect levels reported", "Item wouldn't turn on", etc.
These are the full details of the fault. Enter any information here that may be useful to any other administrator reviewing this fault either now or in the future, as this may be useful in diagnosing other faults.
Fault logs are how the steps towards getting the issue resolved are tracked. The Fault Logs table shows all logs created to date. Clicking the 'Add Entry' button will open a blank Fault Log Window for you to add a new fault log entry. Double-clicking on an entry in the table will open the Fault Log Window containing the full log entry details for you to review or edit accordingly.
Tip - You can click on the headings in the table to organize the list by the clicked heading. For example, clicking the 'Cost' heading will arrange the logs by cost.
The details of the fault, along with the contents of all log entries can be copied to the clipboard by clicking the 'To Clipboard' button. From here they can be pasted into a notepad, or spreadsheet program for further analysis, etc.
Faults are marked as Resolved by clicking the 'Resolved' button at the bottom right of the Fault window. Until they are resolved, their status remains open.
The information area tells you information related to the fault, such as when and by who it was registered, the total costs, whether it's resolved, and if so the resolution date and the administrator who indicated it as resolved.