Setting Up InstruManager |
  
|
Setting Up InstruManager |
|
InstruManager can be downloaded and installed at any time from here: http://www.instrumanager.com/deploy/setup.exe
Once InstruManager is Installed, the set up process will be started automatically. This will take you through the following steps:
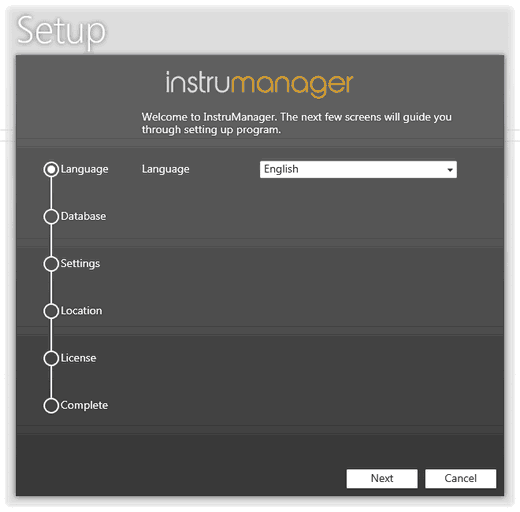
Select the language used in InstruManager. Currently on English is supported, however other languages will be available in forthcoming releases.
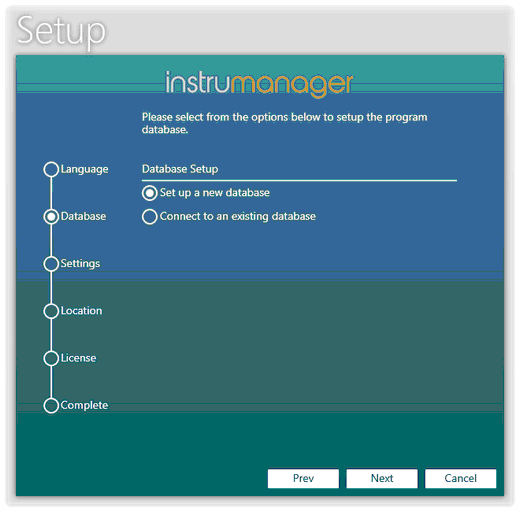
Select whether you want to set up a new database, or connect to an existing one. If this is the first computer you are installing InstruManager on, you will want to select Set up a new database. If this is a subsequent computer, you will want to select Connect to an existing database.
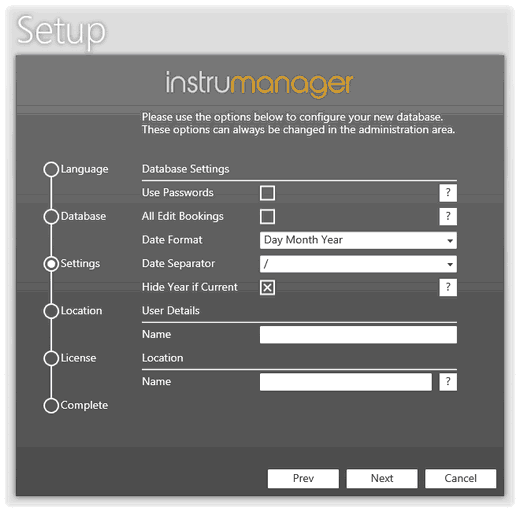
If you selected 'Set up a new database', the next screen will allow you to choose the settings to define how you want your database to behave. Holding the mouse over the ? icons beside each field will give you more information about it to help you understand what it means. Note - these settings can be changed at any time through the Database Settings window.
If you selected 'Connect to an existing database' on the previous screen, this step will be skipped.
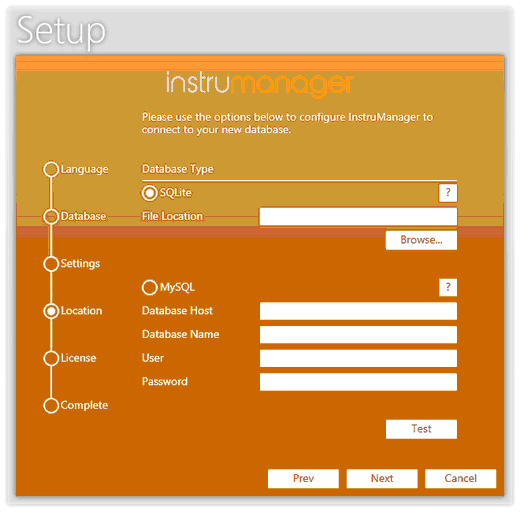
The Database Location screen will be shown next. This is where you tell InstruManager either where you would like your new database to be located, or the location of the existing database if you selected the option to connect to an existing database.
If you choose SQLite, your database will be contained within a file located on your computer or network. If you choose MySQL, your database will be located on your server. Note - If you choose MySQL you will need to have a blank database setup on your server before inputting the Host, Name, User and Password.
If you click the Test button, InstruManager will attempt to connect to the database. Any connection issues will be fed back to you.
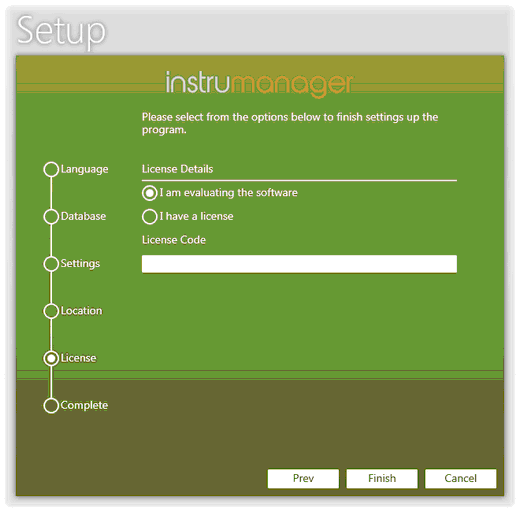
The final stage of the set up process is to either select that you wish to evaluate the software, or if you have already purchased a license, enter your license details. InstruManager can be evaluated for 30 days before a purchased license code will be required to continue using it.
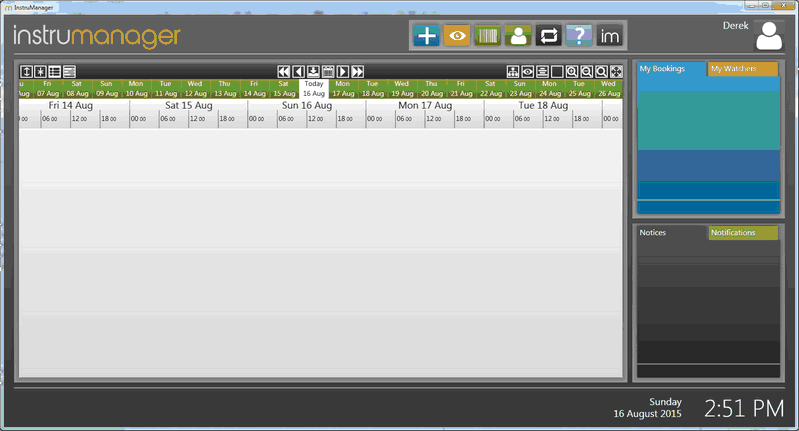
Once you click Finish, either the new database will be created for you, or you will be connected to your existing database. If you created a new database, you will see and empty Time Line. From here, go to the Administration Area to start entering the information about your equipment, users and locations. If you connected to an existing database, InstruManager will be in Station Mode you can Log In as normal.
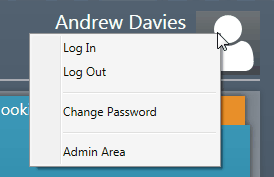
If it is your first time using InstruManager, click on the User icon in the top right corner and select ‘Admin Area’ to enter the Administration Area and start putting in information.
Once in the Admin Area you can access all the data used by InstruManager, create entries into the Fault Tracker, assign responsibilities to users, and generate reports for the equipment items.

To set the program up ready for use by you and other users, simply navigate the different data types, entering in the information as required.
Note - If adding equipment information into the database for the first time, you will need to create Equipment Types before creating any Equipment. This is because each item of equipment must have a type, meaning types must be created first.
Tip – Your equipment, users, locations etc. can be imported in bulk if you have all the required information in a table or Excel spreadsheet for example.
For a tutorial on how to do this, go to the Importing Data page, or watch a video demonstration on the InstruManager Tutorials page (www.instrumanager.com/tutorials.html) and select ‘Tutorial 7 - Importing Data’.
For more information on each data type see:
Also, see the Fault Tracking section for information about tracking fault details, and Notices for information on posting company-wide notices.