Equipment |
  
|
Equipment |
|
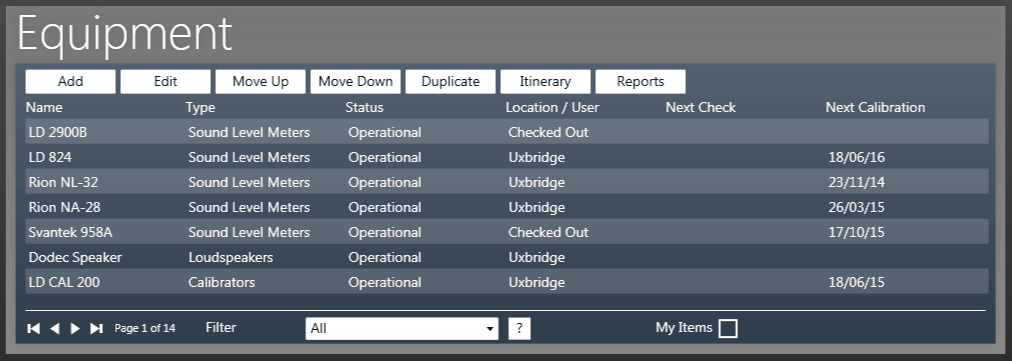
Equipment is created, modified and deleted from the Equipment pane in the Admin Area.
The Add button is used to create a new Equipment. Clicking the Add button will open the Equipment Window ready for you to enter the details of the equipment item you want to create. Note - You must have the appropriate Equipment Type created before adding the item of equipment.
The Edit button is used to edit an existing equipment item. Clicking the Edit button will open the Equipment Window showing the details of the selected equipment item ready for you to edit. You can also double-click on an Equipment Item in the list to do the same thing.
By selecting an Equipment Item in the list and using the Move Up / Move Down buttons, you can change the order the Equipment Items appear on the Calendar, and in the Equipment Selection Accordions located in the Booking Window, among others.
Tip - You can click on the headings in the panes to organize the list by the clicked heading. For example, clicking the 'Next Calibration' heading will arrange the items in order to next calibration date. Clicking the same heading again will reverse the order. This has no effect on the presentation order in the Calendar and Equipment Selection Accordions.
This will create a duplicate of the selected equipment item. This can be useful when entering multiple items of equipment with the same type, attributes etc.
Clicking the Itinerary button opens the Print Equipment Itinerary Window. From here you can print your full itinerary, including the total value, number of uses and numbers and costs of faults within the specified date range.
Clicking the Reports button opens the Print Item Reports window. From here, you can print multiple Item Reports in one go.
The filter allows you to filter equipment by Type, Group, or that assigned to individual users.
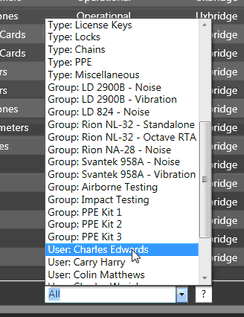
Checking the My Items check box means you will only see equipment in the list that you have been assigned Responsibility for.